Understanding the standard technical polishing process for stainless steel pipes
The standard technical polishing process for stainless steel pipes, featuring 7 detailed steps from cleaning, rough grinding, and fine grinding to final finishing, ensures a shiny, durable, and standard-compliant surface. Check out the article below with Son Ha SSP to clearly understand each step!
1. The 7-Step Standard Technical Polishing Process for Stainless Steel Pipes
To polish stainless steel pipes, several common methods are widely applied, such as mechanical polishing, chemical polishing, and electropolishing. Among these, mechanical polishing is currently the most popular and cost-effective process.
The proper technical process for mechanical stainless steel pipe polishing includes the following 7 detailed steps:
1.1. Step 1: Material Inspection and Preparation
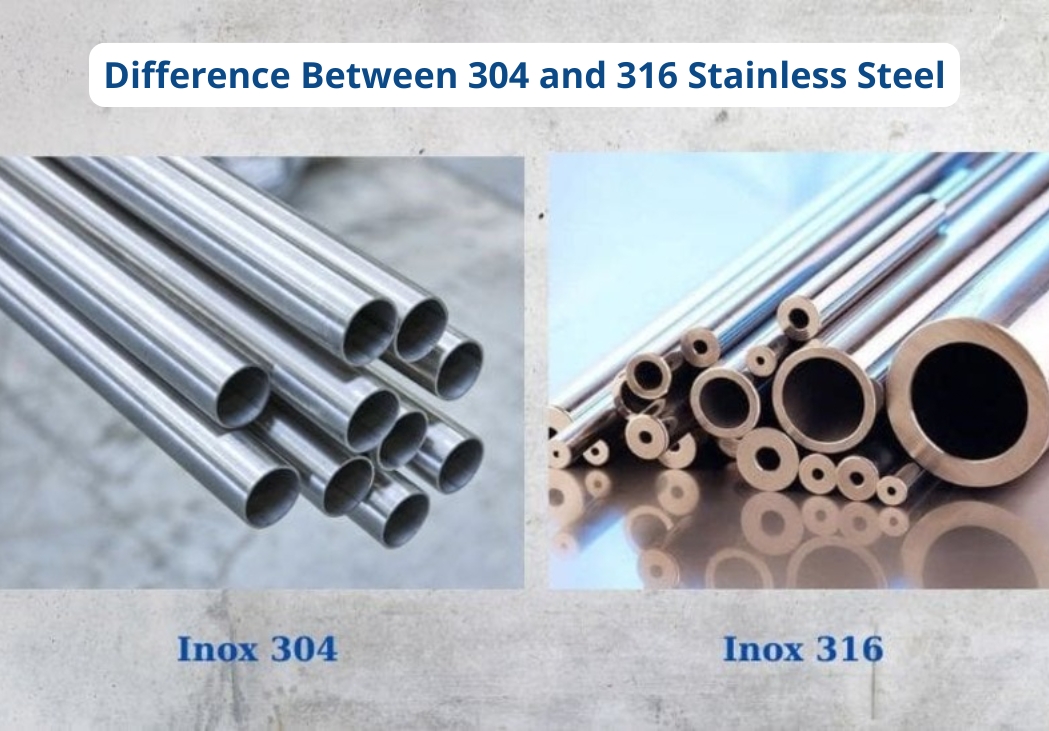
Before starting, a thorough material inspection must be conducted. It is necessary to clearly identify the stainless steel grade, such as 201, 304, 316, or 403. This provides a basis for selecting the appropriate abrasive materials and chemicals, while also assessing the surface condition, such as the degree of scratching, rusting, or oxidation.
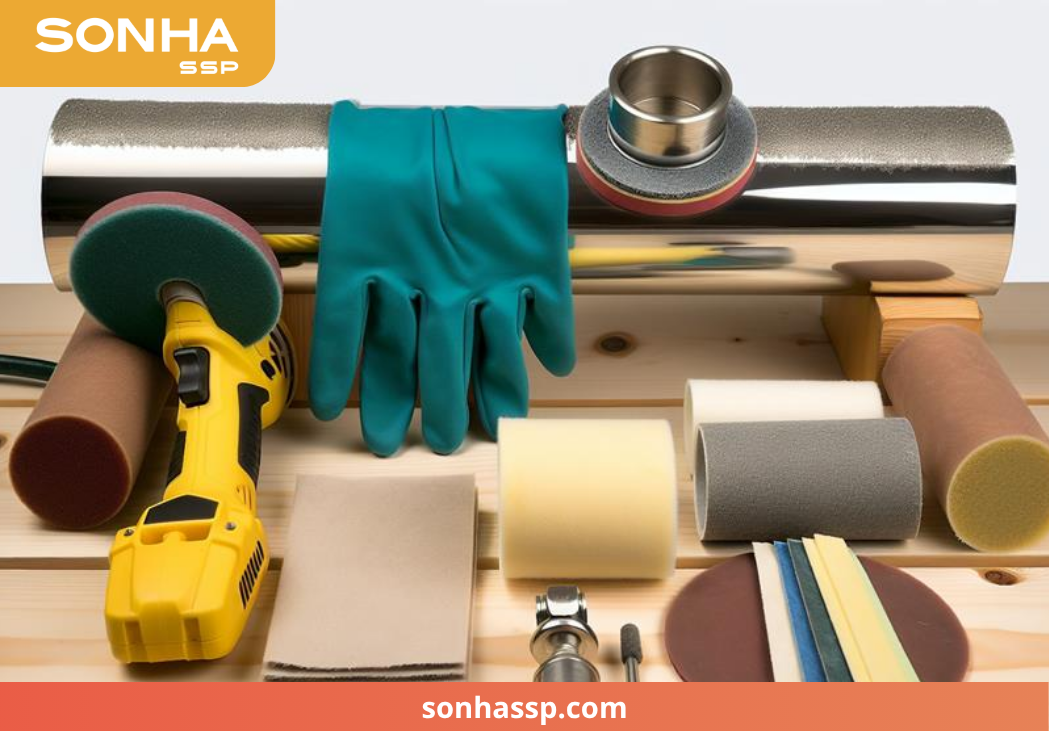
Stainless steel pipe polishing tools
1.2. Step 2: Cleaning the Stainless Steel Pipe Surface
This is a crucial step that cannot be skipped in the stainless steel pipe polishing process. Grease, dirt, and adhesive residues must be completely removed prior to grinding, because if left behind, these contaminants will be ground deep into the stainless steel surface during the process, making them difficult to treat later.
You can use mild cleaning solutions to wash the entire pipe surface. For “stubborn” stains, the stainless steel pipes can be soaked in the cleaning solution for about 5 to 10 minutes. Afterward, rinse with clean water and dry completely before moving on to the next step.
1.3. Step 3: Rough Grinding the Stainless Steel Pipe
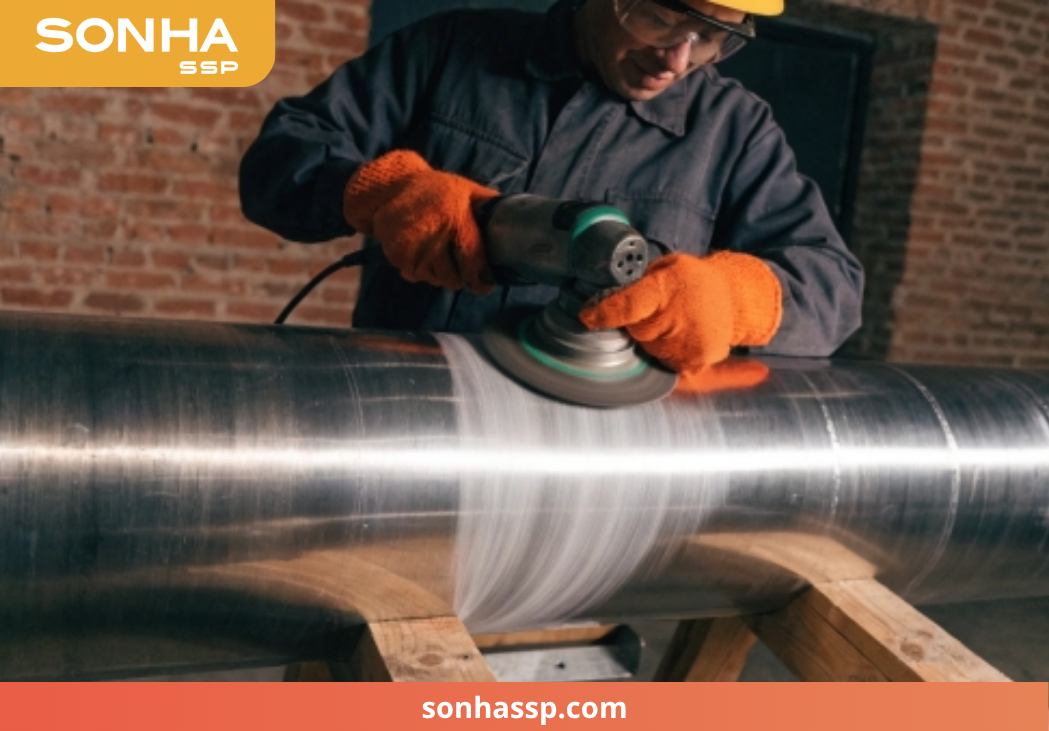
In the stainless steel pipe polishing process, rough grinding is the step that dictates the quality of the entire subsequent procedure. Use sandpaper or grinding discs with grit sizes ranging from P60 to P120 to remove deep scratches, weld marks, black or yellow oxidation layers, or areas with uneven, rough surfaces.
Use sandpaper to rough-grind the stainless steel pipe.
Care must be taken to grind in a single, consistent direction to avoid creating cross-directional scratches. It is recommended to prioritize the use of pipe grinders, surface grinders, or industrial belt sanders to ensure uniform contact across the entire surface of the pipe during the grinding process.
1.4. Step 4: Fine Grinding the Stainless Steel Pipe
After completing the rough grinding stage, the stainless steel pipe surface is further treated using sandpaper with grit sizes ranging from P400 to P800 to remove any remaining minor scratches. This grit level allows for gentle grinding while remaining effective enough to eliminate microscopic ripples that are difficult to see with the naked eye.
Through each abrasive grade, the metal surface gradually transitions to a uniform matte finish, free from mottling or uneven brightness zones. This is the crucial technical foundation, ensuring that the subsequent semi-finishing step applies evenly and yields a smooth, precise final product as required.
1.5. Step 5: Semi-Finishing (Pre-Polishing)
This is an important stage that helps upgrade the stainless steel surface before entering the official mirror polishing phase. In this step, you can use automatic or semi-automatic stainless steel polishing machines, combined with non-woven metal buffing wheels (nylon wheels) and solid polishing compounds (polishing wax).
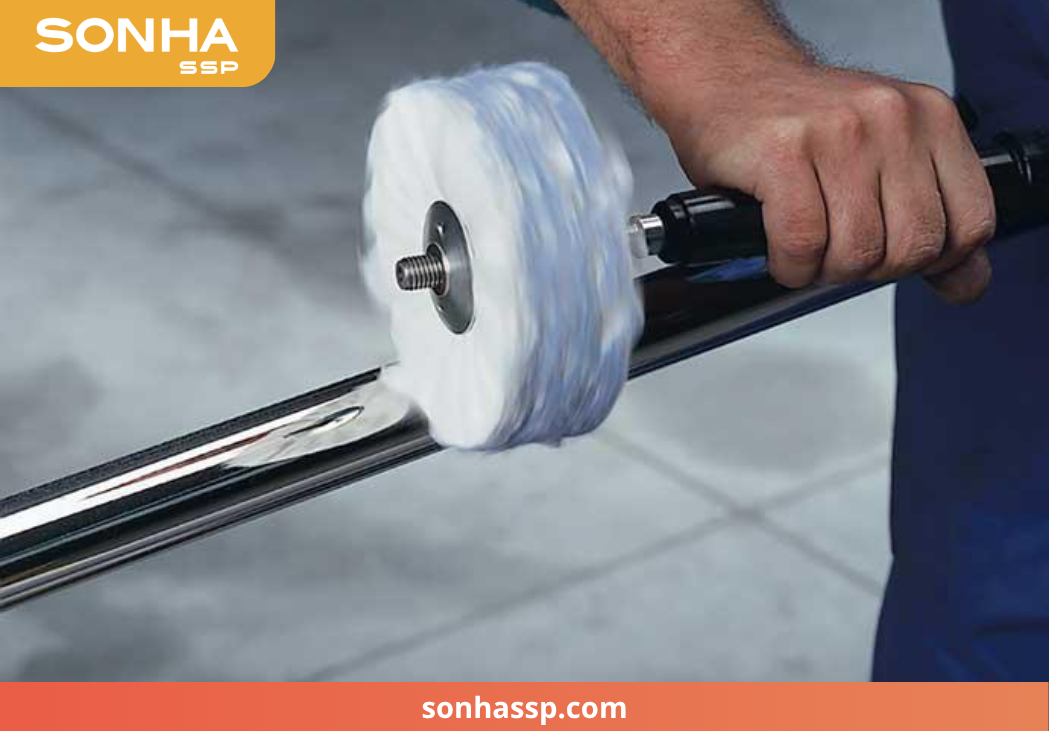
Use metal felt polishing wheels for semi-fine polishing of stainless steel pipes.
This process effectively eliminates any remaining microscopic scratches from the previous processing step while evening out the metal surface structure. As a result, the stainless steel surface becomes noticeably brighter and smoother, creating an ideal foundation for the mirror polishing step to achieve maximum effectiveness.
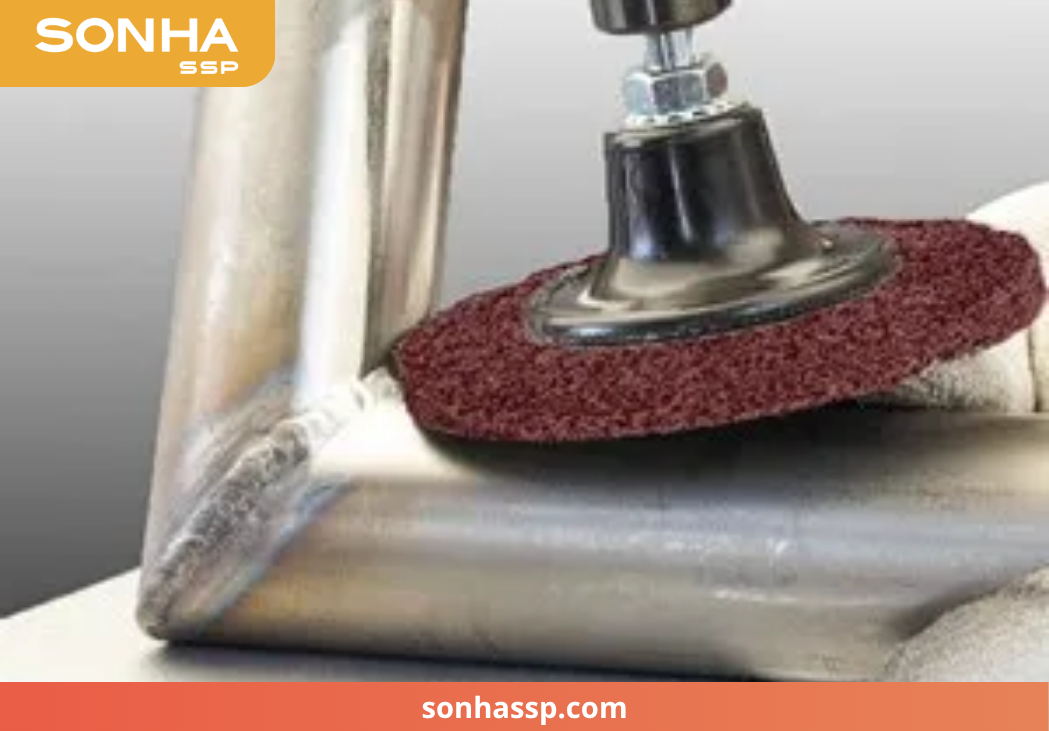
1.6. Step 6: Mirror Polishing
Throughout the entire process, this is the stage that determines the final quality of the stainless steel product, where the metal surface achieves a reflective, mirror-like shine. In this step, use a soft cotton buffing wheel combined with specialized polishing compounds (wax) to completely remove the matte finish from the previous step, replacing it with a deep, uniform gloss across the entire stainless steel pipe.
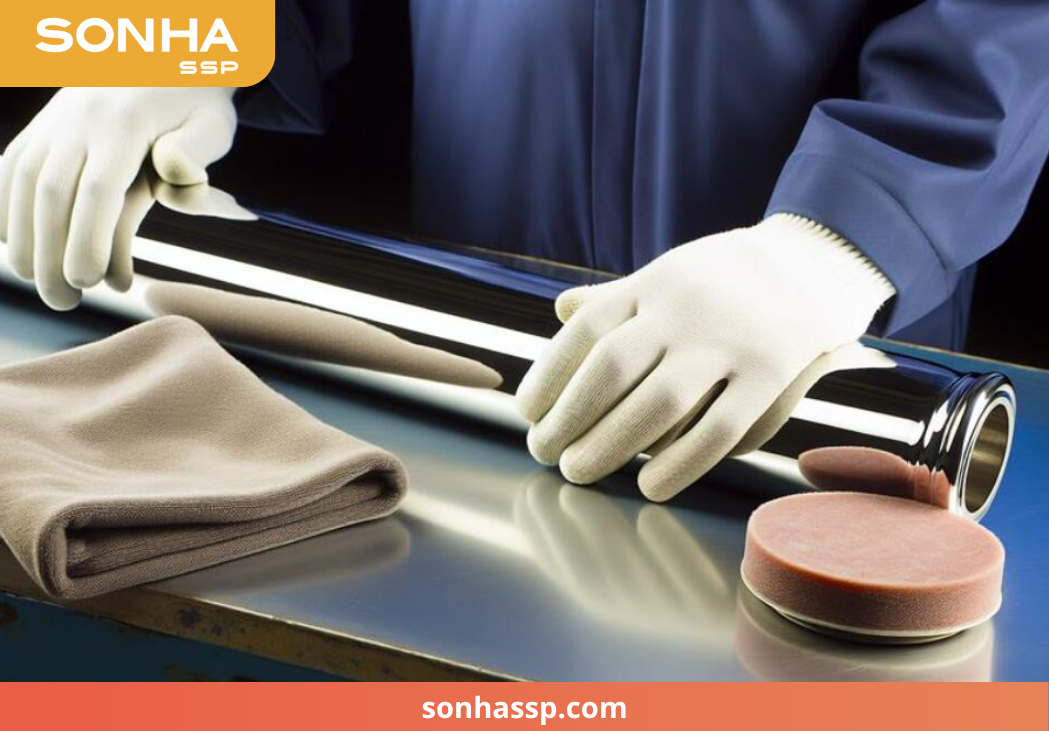
Mirror polishing ensures the stainless steel pipe achieves a sharp, reflective surface.
However, to achieve optimal results, the operator must strictly control three factors: machine speed, applied pressure, and the amount of wax. An imbalance in just one of these can cause the surface to burn or lose its long-lasting shine. When executed with the correct technique, the finished product will feature a sharp, luxurious reflective surface that meets the perfect mirror-shine standard.
1.7. Step 7: Cleaning and Quality Inspection
The final step in the stainless steel pipe polishing process is cleaning and re-inspecting the entire surface. Use a soft cloth along with a mild cleaning solution to wipe away any leftover polishing wax on the surface. Afterward, inspect it carefully under a strong light source, such as LED lighting or sunlight, to detect any remaining scratches or dull spots.
2. Important Notes During the Stainless Steel Pipe Polishing Process
In the stainless steel pipe polishing process, to ensure the finished product achieves the highest quality, you should keep the following points in mind:
-
Use just enough polishing chemicals: Apply only a small amount of polishing wax to the buffing wheel instead of using an excessive amount in hopes of better results. In reality, the excess does not improve polishing efficiency but rather clings tightly to the surface, complicating the final cleaning step.
-
Treat heavy scratches in multiple steps, not with force: Deeply scratched surfaces should be treated in multiple grinding stages, transitioning from coarse to fine grits, instead of applying heavy manual force. The greater the applied pressure, the more prone the surface is to further damage, making it harder to restore in subsequent steps.
-
Grind in a single direction, avoid cross-grinding: Move the grinder straight and evenly along the surface, avoiding intersecting grinding lines. Cross-directional grinding marks will directly compromise the final gloss of the product.
-
Maintain the correct angle and sander speed throughout the process: Maintain a 90-degree contact angle between the machine and the stainless steel pipe surface while keeping the speed within the allowable range. Running the machine too fast generates localized heat, which can easily cause the stainless steel pipe to turn yellow or unexpectedly alter its surface structure.
Move the grinder smoothly across the surface of the stainless steel pipe to ensure the best quality.
The above is the technically standard and effective stainless steel pipe polishing process. We hope that these shared insights will help you easily apply the process in practice. Executing the steps correctly not only provides a shiny and aesthetic appearance but also extends the lifespan of the stainless steel pipes.
Furthermore, if you are looking for a high-quality stainless steel pipe supplier, please explore our products and contact Son Ha SSP immediately via our Hotline at (+84) 986434303 for the fastest support and consultation!
>> RELATED ARTICLES
Understanding the factors determining stainless steel pipe fabrication costs
Top 3 most reputable welded stainless steel pipe manufacturers in Hanoi
Next latest post
Understanding the factors determining stainless steel pipe fabrication costs
Top 3 most reputable welded stainless steel pipe manufacturers in Hanoi
A detailed guide to identifying 304 vs 316 stainless steel pipes